2021. 2. 5. 10:49

나같은 경우는 GCP 통해서 배포를 했는데....


아래 에러가 계속 뜬다......


MongoError: Authentication failed. at MessageStream.messageHandler


아...몽고디비접속이 안된거다...


보니까...배포용 환경변수에 몽고디비 접속 정보를 업데이트 안했다...ㅠㅠ


몽고디비 접속 안되는 에러니까.... 


접속정보 다시 확인해 보면 된다.

Posted by Tyson
2021. 1. 28. 15:16

파베에 테스트로 올린 프로젝트를 잠깐 정지하려는데..


사이트 메뉴에 아무리 찾아도 정지 버튼이 없다....


터미널에서 직접 disable 해줘야한다.


그래서 배포할때 프로젝트폴더로 가서,


$ firebase hosting:disable

이렇게 치면 site 프로젝트 명이 맞냐고 물어보고, Y 하면 정지된다.


반영되는데, 몇분정도 걸리므로, 좀있다 사이트 접속해보면 없는 페이지라고 뜬다.


Posted by Tyson
2021. 1. 22. 18:53

App Engine을 생성할때 아래와 같이 나올때가 있다.


분명히 결제카드도 등록했는데....왜 뜨는지 이해가 안됬다..


난 돈도 잘 내고 있었는데...

왜 안되지 하고...보니...

구글에서 제한을 걸어 놓았다.

결제가능한 프로젝트 수 제한이 있다


기본 3개로 되어있고, 추가 신청을 해야한다.


이유는 이거란다....

https://support.google.com/cloud/answer/6330231


그래서 결국 


할당량 증가 요청을 클릭해서 요청하려는데... 쓸게 많다...


할당량 증가 요청 양식

이렇게 되어있다.


위부터 순서대로, 


1. 이름*

2. 회사명 ( 안써도됨)

3. 프로젝트를 만드는데 사용할 이메일주소* (그냥 프로젝트 만들때 쓴 이메일씀)

4. 얼마나 많은 프로젝트가 요청되고 있나?* (숫자선택)

5. 이프로젝트는 어떤 종류의 서비스를 사용합니다? *

       ㅁ. Compute Engine, BigQuery, Cloud SQL, Cloud Storage, MAPs API 등과 같은 유료 서비스

       ㅁ. Google 클라우드 메시징과 같은 무료 서비스

       ㅁ. 둘다

6. 추가 할당량이 필요한 이유? *

  -> 마지막께 좀 귀찮다... 그냥 나는 프로젝트가 많아서 필요하다 씀......


그리고 제출하면 된다...


그러면, 2틀정도 후에 연락준다고 메일 확인하란다...

Posted by Tyson
2021. 1. 22. 18:26

GCP를 사용하면서 좋은거는 진짜 배포가 너무 편하다.


로컬에서 작업하고, GCP들어가서, 프로젝트 생성하고, 


빌드한 폴더에가서 app.yaml 파일에 리소스 세팅해주고,


그냥 명령어 쳐주면 끝이다.

> gcloud init

# 프로젝트 선택

> gcloud app deploy 


사실 1분은 아니고.... 실제 배포 까지는 3-5분정도 걸리는거 같다.


근데, 바로바로 반영하기 쉬운게, 

나중에는 gcloud app deploy 만 해주면, 알아서 배포가 되니까....

너무 편하다.


그냥 로컬에서 프로젝트 복사해서 수정한 다음에, 

프로젝트 생성하고, 연결만 해주고, 배포 하면, 찍어내듯이 웹사이트를 만들 수 있다.


먼저, GCP 가입하고, 

결제카드 등록을 해라.

그래야지, 배포가 된다. 처음에는 무료 크레딧 많이 주니까... 

그리고, 그거 없어도...많이 사용하지 않는이상은 거의 과금이 안된다.


나 같은 경우는 Angular로 작업한거 배포하는건데, 

Node, PHP, Java 등등 다 지원한다.


1. 새 프로젝트를 생성


프로젝트 이름은 내가 보는거니까 포기 좋게 쓰고,

프로젝트ID는 구분자 같은거다...나중에 삭제할때나, 관리용으로 사용한다.

그냥 랜덤으로 생성해서 사용하면 된다.

그리고 "만들기"


2. 어플리케이션 만들기

"App Engine"에 들어가면, 어플리케이션이 없다고 아래처럼 뜰거다

"어플리케이션 만들기" 클릭 하면, 지역선택이 뜬다.

"asia-northeast3"가 서울이다.

한국에서 사용자가 많으니까. 서울로 선택

Angular 프로젝트니까.. Node.js 선택

여기보면, 언어별로 선택하면 된다.

거의다 있다.

생성하고 나면, 아래처럼 나온다.


3. Cloud SDK 설치


오른쪽에 있는 버튼을 눌러서, SDK를 다운 받아서 설치한다.


이건 생략~ 인터넷에 많으니까~ 터미널에서 gcloud 쳤을때 명령어 뜨면 설치된거다.


4. 프로젝트 빌드하기

프로젝트를 빌드한다. 

나같은 경우는 빌드하면,

/dist/app/myproject

폴더로 파일이 생성되게 해 놓았다.


5. yaml 파일 생성

app.yaml 파일이 있어야 한다.

배포시 프로젝트 설정을 해놓는건데,

인스턴스는 몇개, cpu는 몇개 메모리는 몇개 이런거 세팅하는거다.

app.yaml 파일내용

runtime: nodejs12
env: standard
service: default

instance_class: F1
automatic_scaling:
  target_cpu_utilization: 0.8       # default value 0.6
  min_instances: 1
  max_instances: 1
  min_pending_latency: 30ms         # default value 30ms
  max_pending_latency: automatic    # default value 30ms
  max_concurrent_requests: 10

env_variables:
  NODE_ENV: development
  PORT: 8080

handlers:
  - url: /
    static_files: index.html
    require_matching_file: false
    upload: index.html
  - url: /(.*)
    static_files: \1
    require_matching_file: false
    upload: .*
  - url: .*
    script: auto
    

자세한 설명은 아래 링크에서

cloud.google.com/appengine/docs/standard/nodejs/config/appref


여기서 중요한게..node 버젼이랑

handlers 부분이다.

나 같은 경우는 빌드를 하고, 

빌드된 폴더에 app.yaml파일을 복사하고, 

거기에서 gcloud 를 통해서 배포를 한다.


위 프로세스를 나중에 쉘 스크립트로 만들어 놓으면 편하다.


빌드 -> app.yaml파일 복사(빌드된폴더(/dist/app/project)) -> 폴더로 이동(cd /dist/app/project) -> 배포(gcloud app deploy)


내가 몇시간동안 뻘짓한게... handlers에 index.html 를 절대경로 없이 index.html로만 했었다. 

\1 같은 경우가 . 를 말하는거고. 

.* 같이 root 경로로 한다고 해줘야 한다....


현재 위치 표시로 ./ 이렇게도 해보고 다 해봤는데....

결국 이거다....


---------------

위 처럼 해도 되고, 매번 yaml 파일 복사하는게 불편하면, 편법으로

빌드 위치를 /dist/deploy/myproject 폴더에 빌드된 파일을 넣고,

deploy  폴더에 app.yaml를 만들어서. 

handlers 부분을 아래처럼 지정해줬다.

static_dir 부분에 ./  .  등등 별거를 다 넣어보았는데.... 안먹는다..

그래서 그냥 하위 폴더 만들어서, static_dir에도 하위 폴더를 넣어주었더니....된다...

    
handlers:
  - url: /
    static_files: dist/deploy/myproject/index.html
    upload: dist/deploy/myproject/index.html

  - url: /
    static_dir: dist/deploy/myproject


6. 초기화하기

나처럼 app.yaml복사 안하고 위처럼 할려면 dist/deploy 폴더로 이동하고,

> cd dist/deploy

/deploy/

   --app.yaml

   -- myproject/

이렇게 파일을 넣고, 

 > gcloud init 하면 된다.


그전에 로그인은 꼭 하기

> gcloud login

$ gcloud init
Welcome! This command will take you through the configuration of gcloud.

Settings from your current configuration [default] are:
core:
  account: 내이메일주소@gmail.com
  disable_usage_reporting: 'True'
  project: my-project

Pick configuration to use:
 [1] Re-initialize this configuration [default] with new settings 
 [2] Create a new configuration
Please enter your numeric choice:  1

Your current configuration has been set to: [default]

You can skip diagnostics next time by using the following flag:
  gcloud init --skip-diagnostics

Network diagnostic detects and fixes local network connection issues.
Checking network connection...done.                                                                                                                                                                                                    
Reachability Check passed.
Network diagnostic passed (1/1 checks passed).


나같은 경우는 이전에 했던게 있어서, 1번선택, 새로하는사람은 2번선택한다.


그 다음에, 계정선택

Choose the account you would like to use to perform operations for 
this configuration:
 [1] 내이메일@gmail.com
 [2] Log in with a new account
Please enter your numeric choice:  1

You are logged in as: [내이메일@gmail.com].


위처럼 로그인된 계정을 쓸지, 새로운 계정으로 할지 물어본다.

당연히 1번


그다음에, 프로젝트 선택

Pick cloud project to use: 
 [1] my-project1
 [2] my-project2
 [3] my-project3
 [4] my-project4
 [5] Create a new project
Please enter numeric choice or text value (must exactly match list 
item):  1

Your current project has been set to: [my-project1].

GCP에 생성된 프로젝트 목록이 뜨고, 어떤 프로젝트를 선택할지 고르라고 한다.


여기서 아까 만들어 놓은 프로젝트 번호를 선택하면, 아래같은 설명이 나오고 끝난다.

Not setting default zone/region (this feature makes it easier to use
[gcloud compute] by setting an appropriate default value for the
--zone and --region flag).
See https://cloud.google.com/compute/docs/gcloud-compute section on how to set
default compute region and zone manually. If you would like [gcloud init] to be
able to do this for you the next time you run it, make sure the
Compute Engine API is enabled for your project on the
https://console.developers.google.com/apis page.

Your Google Cloud SDK is configured and ready to use!

* Commands that require authentication will use m20korea@gmail.com by default
* Commands will reference project `m20-center` by default
Run `gcloud help config` to learn how to change individual settings

This gcloud configuration is called [default]. You can create additional configurations if you work with multiple accounts and/or projects.
Run `gcloud topic configurations` to learn more.

Some things to try next:

* Run `gcloud --help` to see the Cloud Platform services you can interact with. And run `gcloud help COMMAND` to get help on any gcloud command.
* Run `gcloud topic --help` to learn about advanced features of the SDK like arg files and output formatting


Updates are available for some Cloud SDK components.  To install them,
please run:
  $ gcloud components update
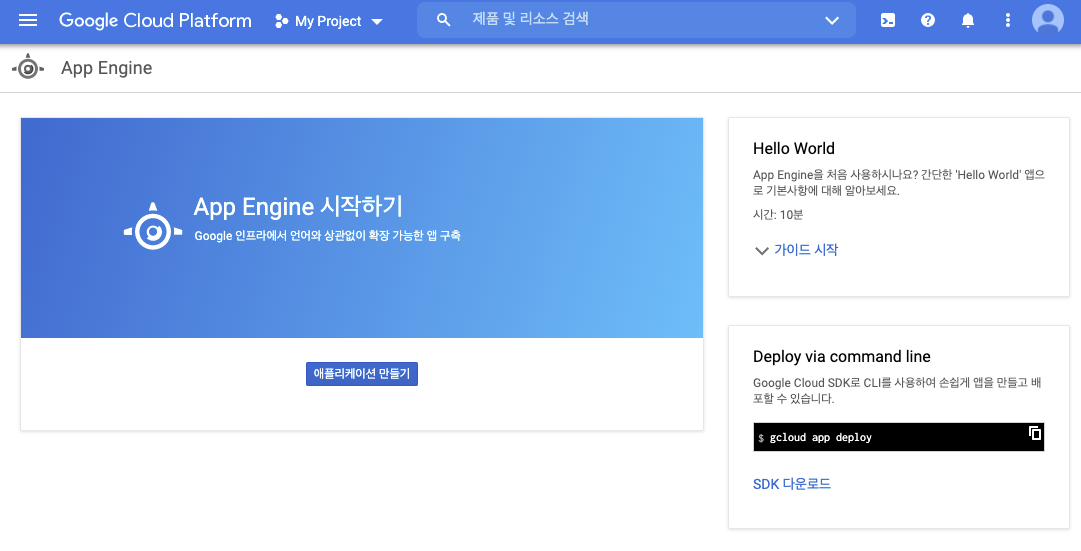


7. 배포하기

이제 마지막이다. 배포하기다.

> gcloud app deploy 

만 치면, 바로 배포하지만, 나같은 경우는 yaml파일도 프로젝트별로 있어서, 명령어에 직접 다 써준다.

> gcloud app deploy app.yaml --project=project1

                                  yaml파일명  프로젝트명

이렇게 하면 굳이 app.yaml파일로 안하고, 내가 원하는 파일명으로 만들어 놓아도 되고, 프로젝트도 선택해서 배포하게 된다.


$ gcloud app deploy
Services to deploy:

descriptor:      [/Users/Documents/GitHub/workspace/project1/dist/apps/project1/app.yaml]
source:          [/Users/Documents/GitHub/workspace/project1/dist/apps/project1]
target project:  [project1]
target service:  [default]
target version:  [20210125t152323]
target url:      [http://project1.du.r.appspot.com]


Do you want to continue (Y/n)?  Y

Beginning deployment of service [default]...
Created .gcloudignore file. See `gcloud topic gcloudignore` for details.
╔════════════════════════════════════════════════════════════╗
╠═ Uploading 166 files to Google Cloud Storage              ═╣
╚════════════════════════════════════════════════════════════╝
File upload done.
Updating service [default]...done.                                                                                                  
Setting traffic split for service [default]...done.                                                                                                                     
Deployed service [default] to [http://project1.du.r.appspot.com]

You can stream logs from the command line by running:
  $ gcloud app logs tail -s default

To view your application in the web browser run:
  $ gcloud app browse


머...대충 경로들 나오고, 배포시 url 정보 나오고, 배포가 끝나면,  아래 설명 나오고 끝난다.

대부분, 프로젝트명.알파벳.알파벳.appspot.com 이렇게 만들어진다.

근데, 만약 프로젝트명이 중복이 없으면, 프로젝트명.appspot.com 으로 도 만들어진다.


으아...진짜 이거 쓰다가..... app.yaml 설정때문에 몇일만에 다쓴다...

api빌드해서 배포할때랑, web 배포하는게 좀 틀려서...좀 해맸다.


Api같은 경우는 package.json에 node main.js 써주고, main.js로 실행하니까, yaml에 따로 세팅할게 없었는데...


Web배포같은 경우는 빌드한거를 올리니....Yaml에 index.html 위치를 써줘야한다.


그리고 로그보는 명령어는 

> gcloud app logs tail -s default 하면 된다.


배포시 위방법 말고, 버킷에 올리고, 배포하는 방법도 있는데...

그거는 아래 링크 참고하길.

www.cs.virginia.edu/~up3f/cs4640/supplement/angular-deployment.html


먼저 이거 설명 올리신 분이 있는데.. 이분도 설명 잘 해놓으셨으니, 참고 하길 몽고디비 세팅부분까지 설명 있음.

online.codingapple.com/unit/nodejs-deployment-googlecloud/?id=1826

이 분은 GCP 기본 8080이기 때문에 server.js에 listen 8080 세팅을 해주셨는데... 

나는 그냥 handlers에서 index.html불러오는걸로 끝냈다.


파이어베이스는 배포하기 더 쉽다.

그건 다음에 포스팅하겠다.


Posted by Tyson